MatterControl has a rich set of controls that you can use to manually control your printer's function and make adjustments during printing
You can find the manual controls on the far right after selecting and opening a printer.
Movement
The Movement section of the Controls pane allows the user to manually move the printer nozzle(s), and extrude and retract filament when no print is active. This section also serves as fine movement adjustment during an active print.

The homing controls allow you to home one or all axes (move it to the starting position). The Release button disables power to the motors, allowing you to move the printer by hand. You can select how far you want the printer to move. The printers current coordinates are shown on the bottom. You can adjust the speeds that the printer will move at by clicking the pencil icon  .
.
Live Adjustment While Printing
While your printing is running you can use the Z+ and Z- buttons to adjust the height of the nozzle. This allows you to tune the height for a good first layer without having to restart the print. The current Z Offset is shown at the top of the Movement section. This is remembered for future prints. After printing, you can clear the Z offset by clicking the X.
Keyboard Controls
Clicking the keyboard icon ![]() allows you to move the printer with your keyboard.
allows you to move the printer with your keyboard.

Calibration
The calibration section of the controls allows you to manage MatterControl's software print leveling feature. Software print leveling is only available on printers which do not use their own form of automatic print leveling.

Click the pencil icon to view or edit the print leveling data.
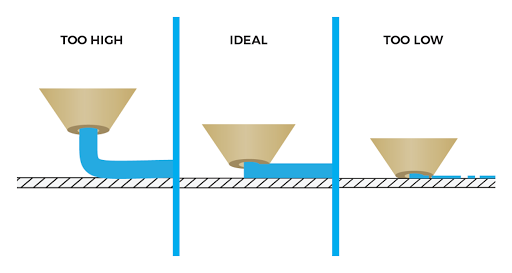
Bed Leveling
Click the gear icon to open the Print Leveling Wizard. It will guide you through taking measurements of the height of the bed at various points.
Use the toggle switch to enable or disable software print leveling. Some printers are not capable of manual leveling. In this case, software print leveling cannot be disabled.
Calibrate Probe Offset
Click the gear icon to measure the offset between your printer's probe and the nozzle. This feature is not available if your printer does not have a leveling probe.
Macros
Macros are snippets of saved G-Code which can be called with the click of a button instead of having to be typed repeatedly.
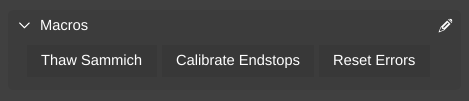
See the article on Macros for more information.
Fan
The fan control lets you turn the printer's layer cooling fan on and off, and also set the speed.
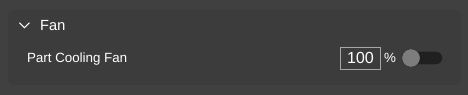
You can adjust the fan speed during printing, however your adjustment will only last until the next fan speed change encountered in the G-Code.
If your printer does not have a layer cooling fan then this control is not shown.
Power Control
If the printer's controller board supports it then this section allows for direct control of the printer's PSU.

Tuning Adjustment
Allows for on-the-fly adjustment of speed and extrusion during a print.

These settings are reset to 1.0 whenever MatterControl is restarted.
Speed Multiplier
The speed multiplier can be used to speed up or slow down a print. The speed multiplier applies to all types of moves. The lowest possible setting is 0.25 and the highest possible is 3.0.
Extrusion Multiplier
During an active print, the extrusion multiplier modifies the extrusion flow rate, allowing you to increase or decrease the amount of plastic laid down.
This variable is different from that of the Extrusion Multiplier slice setting and will work in conjunction with it. For example, if the slicer setting is set at 1.06 and then the slider in Controls is used during the print and set to 1.08, the total result will be a multiplier of 1.1448 (1.06 * 1.08).
Firmware Updates
If your printer has an Arduino Mega 2560 based microcontroller, you can use the firmware updater to upload new firmware to it.

If your printer is officially supported by MatterHackers (for instance the Pulse), the firmware updater will automatically check your firmware version and alert you if an update is available. Click the Update button to do an automatic update.
You can also update the firmware on other printers but you will need to acquire a firmware image from the printer's manufacturer. The firmware image must be a compiled .hex file. Click the Change button to select a firmware image file.
The firmware updater will automatically make a backup of your printer's old firmware before uploading the new firmware. If the new firmware has problems, you can click the Revert button to flash the backed up firmware.
The firmware updater does not require MatterControl to successfully connect to your printer in order to function. This allows you to upload new firmware to a printer which currently has corrupted firmware or no firmware at all.