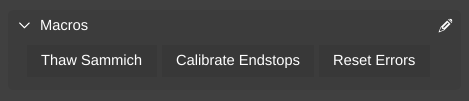
Macros are snippets of saved G-Code which can be called with the click of a button instead of having to be typed repeatedly.
The Macros section of the Controls pane is where the user creates and stores these macros.
To learn more about G-Code and its utility in 3D printing, check out this resource: http://reprap.org/wiki/G-code
Macro Editor
To access the Macro Editor, click the pencil icon
( ) next to the word Macros. This will open the Macro Presets window.
Macros Manager

Macro Editor

Macro Name
Enter a unique name for the macro. This will be the label on the button shown in the Controls pane.
Macro Commands
Enter G-Code command(s) in this field. The G-Code commands will be sent to the printer. In addition to standard G-Code, macros support these other features
- You can add comments to the code using a semicolon
;. Comments will not be sent to the printer. - You can use brackets
[]to insert G-Code replacement variables. - You can use
; host.commands to script events in MatterControl. This is described below.
Macro Scripting
In addition to the G-Code commands sent to the printer, macros allow you to script events on the host side, within MatterControl itself. This allows you to display messages or ask for input from the user. These functions are called by using commands within the G-Code comments.
Syntax
To use a macro scripting command, begin the line with the following statement:
; host.
Then add a command and any applicable parameters.
command(parameter:"value")"
The result should look something like this:
; host.show_message(title:"Waiting for extruder to heat to [temperature].")
Commands
ding()
Play a bell sound.
show_message()
Shows the specified message. This command takes the following parameters.

choose_material()
Shows the choose material window. This command takes the following parameters.

Example Script
The following is an example of a script used for loading filament:
; host.choose_material(title:"Choose the material that you are loading.")

M104 S[temperature] ; start heating up the extruder

; host.show_message(title:"Trim the end of the filament to ensure a good load.", image:"https://cdn.instructables.com/FSW/FEGA/HN4ZL57T/FSWFEGAHN4ZL57T.MEDIUM.jpg", wait_ok:"true")

M302 S0  ; Allow extrusion at any temperature
G91                 ; Relative positioning
; host.show_message(title:"Put filament into extruder and click Continue.", repeat_gcode:"G1 E.1 F150|G4 P10", expire:"90", image:"https://s3.amazonaws.com/cdn.freshdesk.com/data/helpdesk/attachments/production/5035400628/original/20150903_115628.jpg?1441307271")
G90                 ; Absolute positioning
; host.show_message(title:"Loading filament...", count_down:"28")
G92 E0              ; reset the extruder position to 0
G91                 ; Relative positioning
G1 E100 F1200       ; extrude the filament
G1 E100 F1200       ; extrude the filament
G1 E100 F1200       ; extrude the filament
G1 E100 F1200       ; extrude the filament
G1 E100 F1200       ; extrude the filament
G4 S1               ; wait for move to finish

M302 S150  ; Set cold extrude temp back to reasonable
; host.show_message(title:"Waiting for extruder to heat to [temperature].")
M109 S[temperature] ; heat up the extruder

; extrude slowly so that we can prime the extruder
; host.show_message(title:"Click 'Continue' when filament is running cleanly.", repeat_gcode:"G1 E1 F300|G4 P10", expire:"90")

G4 S1               ; wait for move to finish
G90                 ; Absolute positioning
G92 E0              ; reset the extruder position to 0

M104 S0             ; turn the extruder temperature off